Windows Build
This document covers the build and execution instructions for Plaid on Windows.
Download Plaid from the link provided to you and unzip the folder.
Plaid Build
Plaid uses cmake and Visual Studio 2019 (https://visualstudio.microsoft.com/downloads/) to build. Newer versions of Visual Studio will work but select the 2019 string when building. Binary dependencies provided below were built with Visual Studio 2019 x64. Plaid should be built using the same settings.
Download and install cmake for windows: https://cmake.org/download/.
Git for windows also includes an linux like shell with cmake that works as well: https://git-scm.com/download/win
Cygwin or msys might also work.
Dependencies
Plaid has the following library dependencies:
- curl
- OpenSSL (or another libcurl supported TLS library)
- xerces 3.1+
Prebuilt binaries for the dependencies can be found here: https://github.com/gridfabric/plaid-deps/releases/latest/download/plaid-deps_Windows_x64.zip These binaries were build with visual studio 2019 for x64. Plaid must be built using these same settings.
If a newer version of visual studio is needed, the deps can be rebuilt following the github workflow document found here: https://github.com/gridfabric/plaid-deps/blob/master/.github/workflows/make-release.yml
General build instructions (Release)
The following instructions will create a release build of plaid and the plugin.
- Install Visual Studio 2019 or newer
- Install cmake (see options above)
- Copy the pre-built dependencies from above to a directory called
depsunder the plaid source root. - Run the following from the root directory to create a build directory and build the project:
mkdir release && cd release
cmake .. -G "Visual Studio 16 2019" -A x64 -DCMAKE_BUILD_TYPE=Release
cmake --build . --config Release
This will create the following files in the Release directory:
plaidven.exe- main executableplaidven-notifierhttp-plugin.dll- plugin library (referenced in plaid config file)
Running Plaid
Plaid is executed from the command line and takes two parameters: a path to a json
formatted schema file (which describes the Plaid config), and the path to a config file.
See the sample file <rootdir>\plaid\config\config.json.sample.
.\plaidven.exe path\to\schema.json path\to\config.json
See the configuration page to configure plaid.
Build Plaid in Debug
To build Plaid in debug mode, substitute Debug for Release and run the commands from above.
If modifications are made to any source files, run the cmake --build command
to pickup the changes. If files are added or removed from the project, rerun
the first cmake command to regenerate the project files, and then run the second
command to build.
Debugging the plugin
The first cmake command creates a visual studio solution file in the current directory. When a debug build is created, this file can be used to build and debug plaid and the plugin using visual studio.
Here are the basic steps:
- Open the Plaid.sln file in visual
- Select ALL_BUILD and build the solution
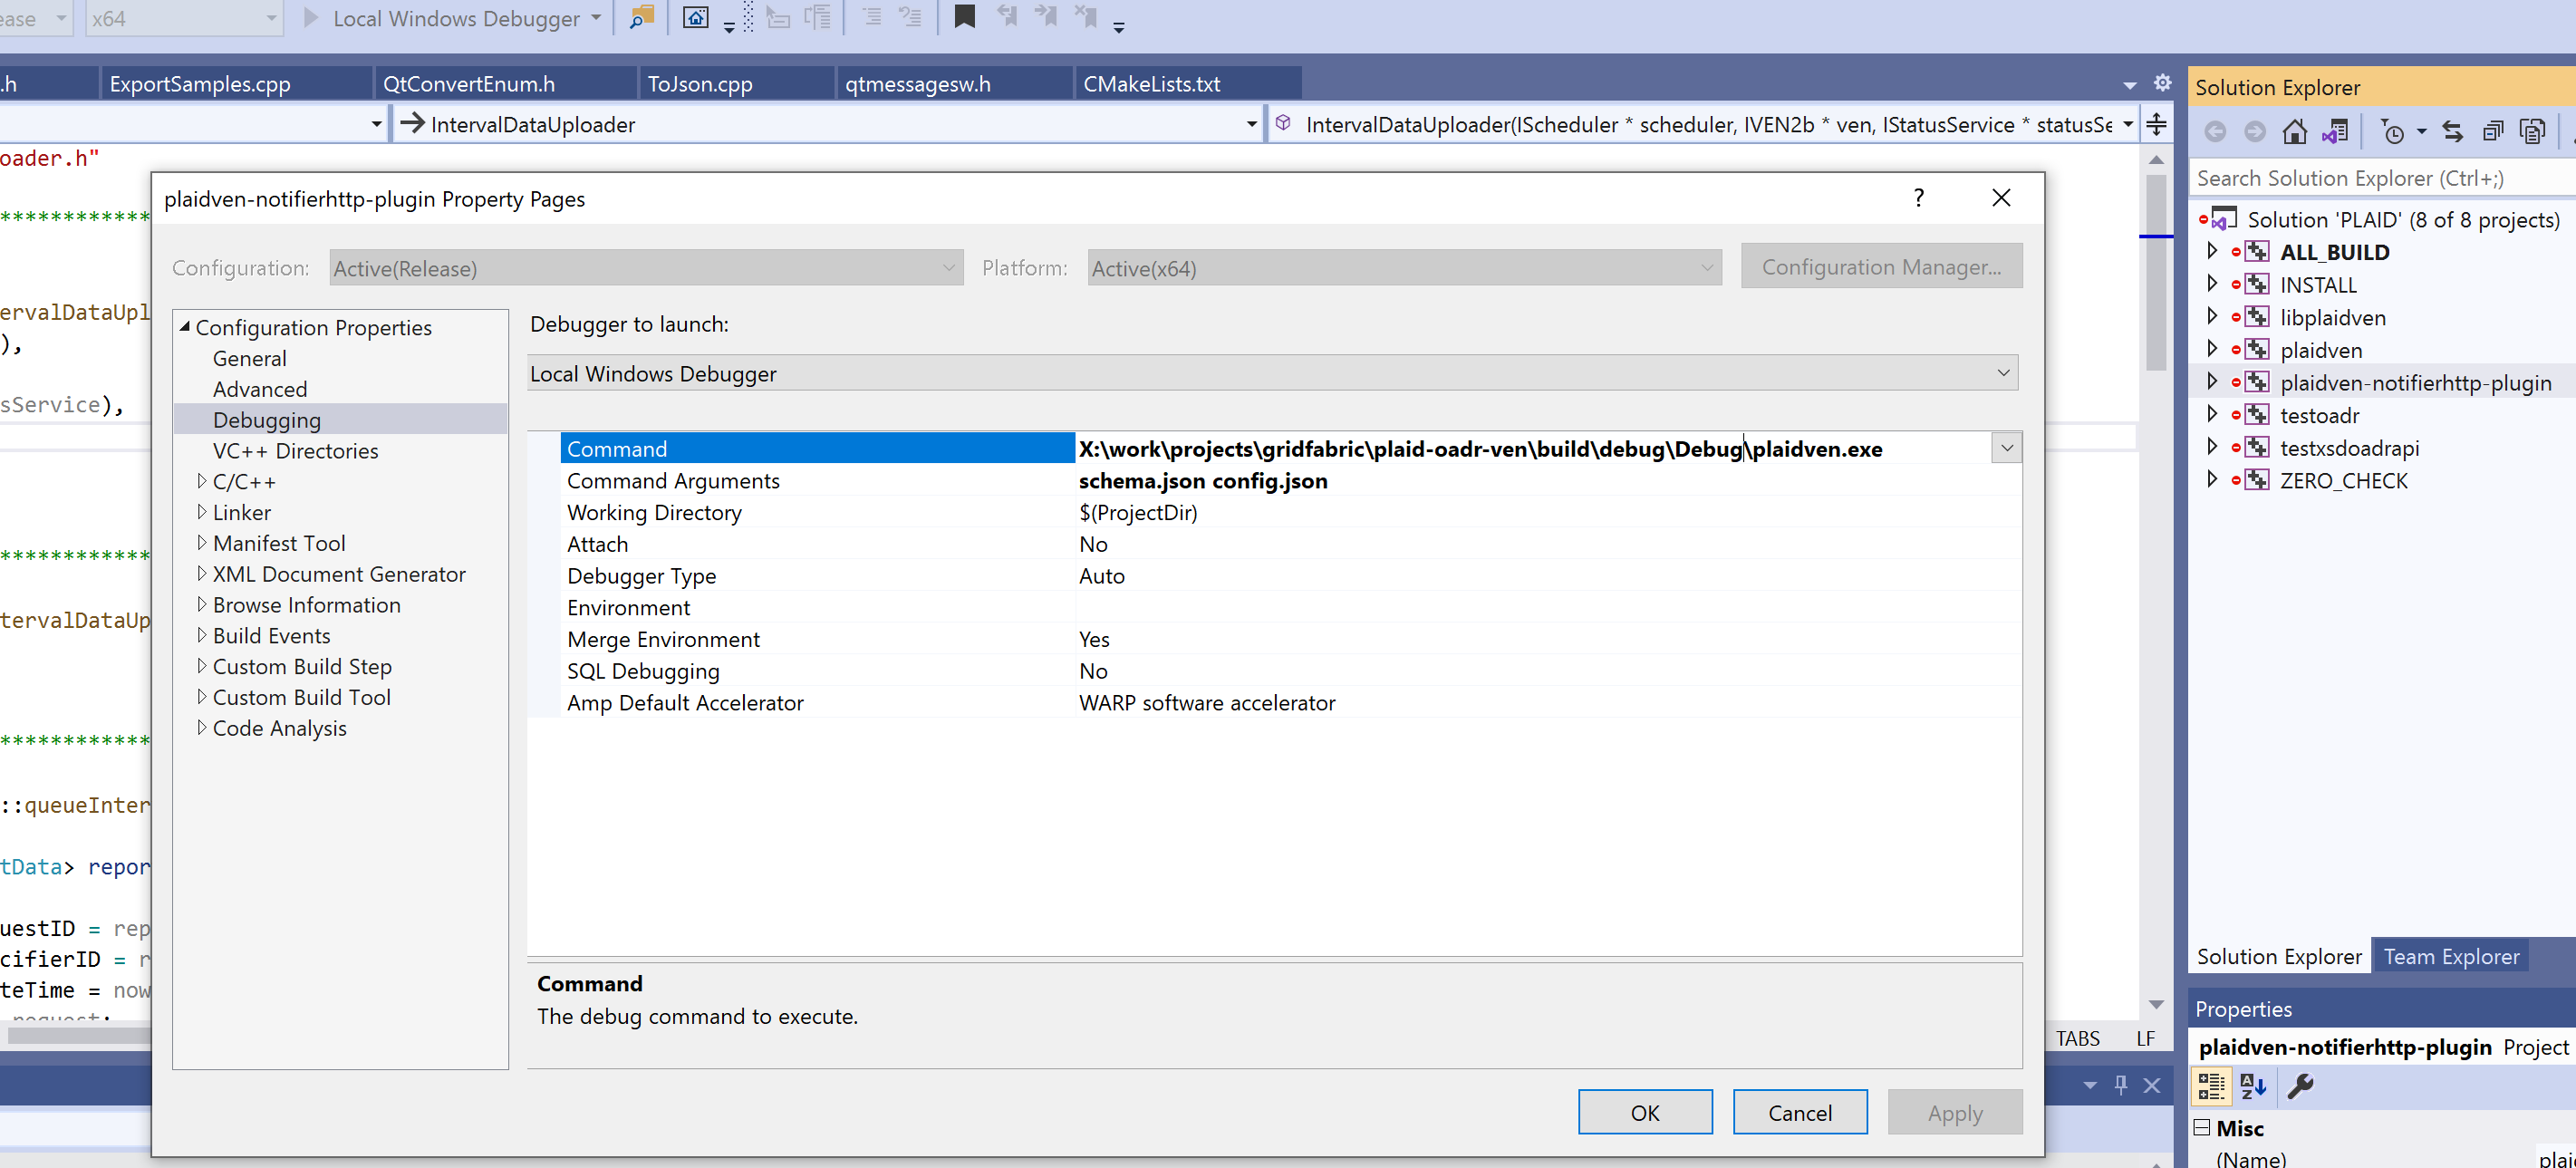
- When the build completes, right click on the
plaid-notifierhttp-pluginproject and select properties and select Debugging - Set the Command option to the plaid.exe file that was built in the Debug directory
- Copy schema.json and config.json files to the
Debugdirectory containingplaid-notifier-plugin.dll

Next, start the debugger on the plaid-notifierhttp-plugin project and set breakpoints as needed.